Onions are a staple in almost every kitchen, and growing them at home is surprisingly simple. Once you understand a few basics about timing, soil, and variety, you can harvest pounds of sweet, flavorful onions from even a small garden bed. They store well too, so a summer harvest can keep your kitchen stocked for months.
This step-by-step guide walks you through everything you need to plant onions and grow them into large, firm, delicious bulbs.
Understand Onion Types
Before planting, you need to choose the right kind of onion for your location. Onions are grouped by how much daylight they need to form bulbs:
- Long-day onions: Need 14 to 16 hours of daylight. Grow well in northern regions.
- Short-day onions: Need 10 to 12 hours of daylight. Grow well in southern regions.
- Day-neutral onions: Work in most climates and are a safe bet for beginners.
Planting the wrong type means your onions will never bulb up properly. Check your zone before buying seeds or sets.
Choose How to Plant: Seeds, Sets, or Transplants
You have three options for planting onions, and each has its strengths.
- Seeds: Cheapest option and the widest variety selection, but take the longest.
- Sets: Small dry bulbs planted in spring. Easy and beginner friendly, but limited in variety.
- Transplants: Young plants sold in bunches. Reliable and fast, great for large bulbs.
For beginners, transplants or sets give the quickest success. Seeds reward patience with a huge variety of options.
When to Plant Onions
Onions are cool season crops. They need time to grow leaves before warm weather triggers bulb formation.
- In cold climates, plant in early spring as soon as the soil can be worked.
- In warm climates, plant in fall or very early winter.
- Seeds can be started indoors 8 to 10 weeks before transplanting.
The general rule is: more leaves before bulbing means bigger onions. Each leaf turns into a ring in the bulb.
Prepare the Soil
Onions love loose, rich, well-drained soil with a pH between 6.0 and 7.0. Before planting:
- Pick a spot with full sun, at least 6 hours per day.
- Work 2 to 3 inches of compost into the top 6 inches of soil.
- Remove rocks and large clumps that could deform the bulbs.
- Avoid spots where onions, garlic, or leeks grew last year.
Onions are shallow rooted, so loose soil on top matters more than deep tilling.
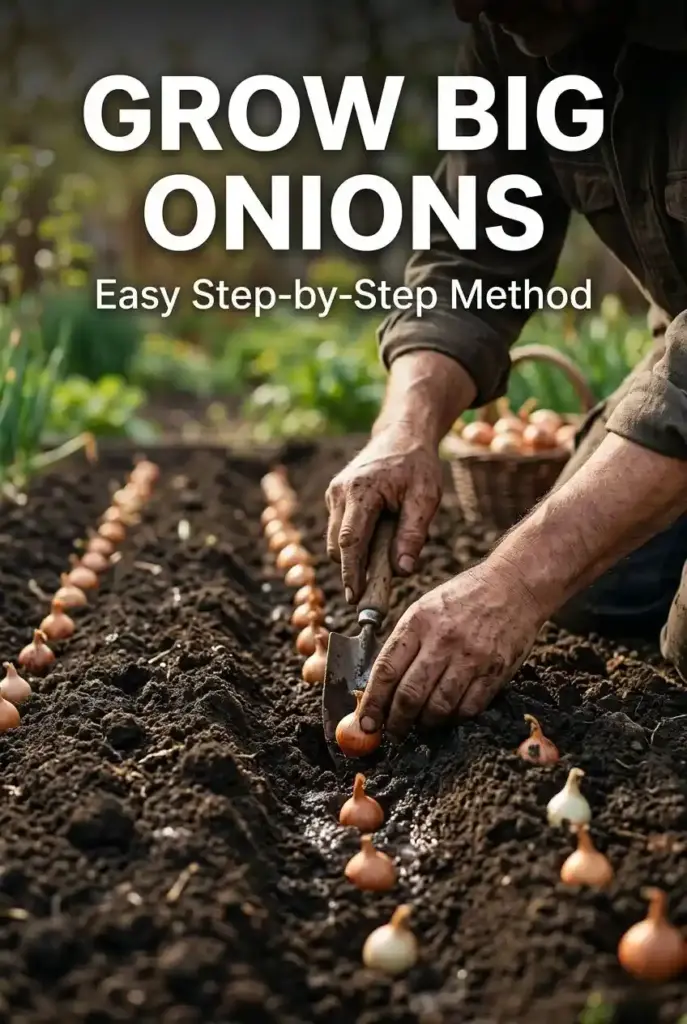
How to Plant Onions Step by Step
Whether you are planting sets, transplants, or seedlings, the process is similar.
- Plant sets 1 inch deep with the pointed end up.
- Plant transplants 1 inch deep, firming the soil gently around the roots.
- Space plants 4 to 6 inches apart in rows 12 inches apart.
- Water right after planting to settle the soil.
If you want green onions, plant extras closer together and pull them young as you thin the bed.
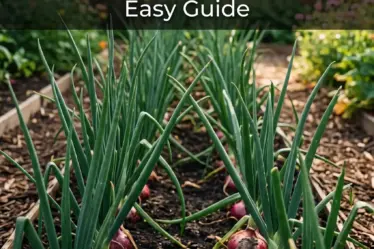
Watering Onions
Onions have shallow roots, so they dry out quickly. Give them about 1 inch of water per week, more during hot weather. Consistent moisture is key to sweet, mild bulbs. Water at the base, not overhead, to reduce disease. Mulching with straw or grass clippings keeps the soil cool and moist and helps block weeds.
Feeding Onions
Onions are heavy feeders while they are growing leaves. Give them a nitrogen rich fertilizer every 2 to 3 weeks until the bulbs start forming. Once you see the soil cracking as the bulb swells, stop fertilizing. Continued nitrogen at this point delays maturity and weakens the skins.
Weed Carefully
Onions do not like competition. Weeds steal water, nutrients, and sun from their shallow roots. Hand pull weeds rather than hoeing deeply, since hoes can easily damage onion roots. A good layer of mulch keeps most weeds away.
Signs Your Onions Are Ready to Harvest
Most onions are ready in 90 to 120 days. Look for these signs:
- The tops yellow and fall over naturally.
- The bulbs push up from the soil.
- The outer skins start to dry and get papery.
Once about half the tops have fallen, stop watering and let the bulbs finish maturing in the ground for another week.
Harvesting and Curing
On a dry day, gently lift the bulbs with a garden fork. Brush off the soil but do not wash them. Lay them in a single layer in a dry, shaded, well-ventilated space for 2 to 3 weeks to cure. When the outer skins are completely dry and the necks are tight, the onions are ready to store.
Trim the tops to about an inch and cut the roots short. Store in mesh bags or crates in a cool, dry spot. Properly cured onions can last 3 to 6 months.
Common Onion Mistakes to Avoid
- Planting the wrong day-length variety for your region.
- Over-watering once bulbs start forming.
- Letting weeds crowd out young plants.
- Skipping the curing step, which shortens storage life.
- Harvesting too early, before the necks have dried.
Final Thoughts
Growing onions at home is simple, affordable, and rewarding. Once you pick the right variety for your region and give the plants loose soil, steady water, and enough time, you will end up with bulbs full of flavor and a pantry stocked for months.
Whether you plant a small patch for fresh cooking or a big bed for long storage, onions are one of those crops that pay you back many times over. Grab a handful of sets or transplants this season and discover just how easy homegrown onions can be.